Moving On: The Tenant's Playbook for End of Tenancy Cleaning
Moving out of a rental property is a significant milestone that comes with a range of responsibilities. Among these, none is as crucial (or as stress-inducing) as end of tenancy cleaning. Whether you are a first-time renter or a seasoned tenant, understanding the ins and outs of leaving a rental property spotless is vital to ensuring the return of your deposit and maintaining a positive landlord-tenant relationship. In this comprehensive guide--"Moving On: The Tenant's Playbook for End of Tenancy Cleaning"--we will explore everything you need to know to ace your move-out clean, with expert tips, checklists, and a full breakdown of the essential cleaning procedures to help you move on stress-free.
Understanding End of Tenancy Cleaning
End of tenancy cleaning is the thorough cleaning of your rented property before you hand the keys back to your landlord or letting agent. This process goes well beyond the weekly tidying; it ensures every corner is as immaculate as when you moved in. Landlords and rental agencies expect the property to be cleaned to a "professional standard"--a requirement often stipulated in your tenancy agreement.
Why is End of Lease Cleaning so Important?
- Deposit Recovery: Most disputes between tenants and landlords revolve around cleaning. A comprehensive clean is essential in getting your full deposit back.
- Compliance: Many tenancy agreements legally require the property to be returned in a clean, original condition--failure to do so can result in deductions.
- Reputation: Leaving a property spotless maintains your reputation as a responsible tenant, which can be invaluable for references in the future.
- Goodwill: A clean handover leaves a positive final impression and minimizes disputes or delays in moving out.

DIY vs. Professional End of Tenancy Cleaning
When preparing for your end of tenancy clean, you'll face a critical decision: Should you clean the property yourself or hire a professional cleaning company?
Pros of DIY Cleaning
- Cost-effective: Doing it yourself saves money, especially if your budget is tight after a big move.
- Control: You have direct oversight over what is cleaned and how thoroughly.
- Personal Satisfaction: There's a certain accomplishment in tackling the task yourself.
Cons of DIY Cleaning
- Time Consuming: Deep cleaning can take several hours, sometimes even days.
- Physical Effort: It can be an exhausting process, especially if you're juggling other moving tasks.
- May Miss Professional Touch: Without the right tools or cleaning products, it's easy to overlook details that a professional end of tenancy cleaning company would handle.
Benefits of Hiring Professional Cleaners
- Efficient and Thorough: Professional cleaning teams have the experience, expertise, and equipment to achieve a deep, high-standard clean.
- Saves Time and Stress: Outsourcing the task lets you focus on your move.
- Deposit Guarantee: Many companies offer a deposit-back guarantee, providing peace of mind if your landlord isn't fully satisfied.
- Compliance with Agency Standards: Letting agencies and landlords often require "professional cleaning," which can be assured only when certified cleaners do the job.
End of Tenancy Cleaning Checklist: Room by Room Guide
Regardless of which route you choose, a meticulous end of tenancy cleaning checklist is indispensable. Here's a detailed, step-by-step guide covering all the crucial areas of your rental:
General Areas (All Rooms)
- Dust all surfaces, including shelves, skirting boards, window sills, and light fixtures
- Wipe doors and handles, including top edges and corners
- Clean switches, sockets, and plugs
- Vacuum carpets, rugs, and upholstery thoroughly; consider professional carpet cleaning if required by your contract
- Sweep and mop hard floors
- Spot clean walls (but check your deposit agreement before applying harsh chemicals)
- Clean inside windows and window frames
- Check ceilings for cobwebs and marks
- Remove all rubbish and personal belongings
Kitchen Deep Clean
- Empty and clean cupboards and drawers - remove crumbs, stains, and old shelf liners
- Degrease worktops, tiles, and splashbacks
- Clean all appliances:
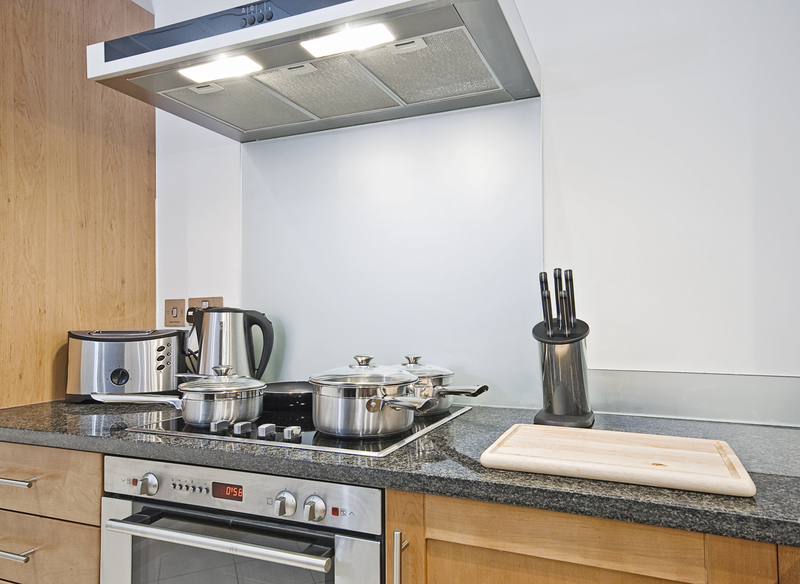
- Oven and hob: Use a dedicated oven cleaner to remove grease and burnt-on residue
- Microwave: Clean inside, outside, and under the glass plate
- Fridge/freezer: Defrost, wipe all surfaces, and leave switched off with the door open
- Dishwasher and washing machine: Clean filters, rubber seals, and detergent trays
- Wipe down sinks and taps, removing lime scale buildup
- Clean extractor fans and change or clean filters
- Sweep and mop the floor, paying special attention to grout or tile lines
Bathroom Blitz
- Scrub toilets, sinks, and baths/showers with disinfectant and scale remover
- Clean all tiles, mirrors, and shower screens
- Wipe down taps and fixtures, removing any calcification
- Clean inside and behind cupboards and shelving
- Wash or replace shower curtains
- Sweep, mop, and scrub floors, especially around toilets and behind radiators
Bedrooms & Living Rooms
- Dust and clean wardrobes, drawers, and other furniture
- Vacuum mattresses and upholstery
- Polish mirrors and picture frames
- Check underneath beds and inside wardrobes for forgotten items
- Wipe down headboards, skirtings, and radiators
Outdoor Areas (If Applicable)
- Sweep patios, pathways, and entryways
- Remove any rubbish or weeds from the garden
- Clean bins and bin storage areas
Commonly Forgotten Areas during End of Tenancy Cleaning
Many tenants lose part of their deposit due to overlooked areas. Here's a list of frequently missed spots:
- Behind and under appliances (fridge, washing machine, etc.)
- Inside extractor fans and air vents
- Window frames and sills (including mould in corners)
- Skirting boards, door frames, and architraves
- Light fittings and lampshades
- Switch plates and plug sockets
- Top of high cupboards or wardrobes
- Radiators (front and behind)
- Grout and tile joints in kitchens and bathrooms
- Inside bins
How to Plan Your End of Lease Cleaning
With the above checklist in hand, meticulous planning is key for a smooth move-out experience. Here's how to organize your final cleaning process:
- Book Your Cleaning Window: Set aside at least a full day, preferably after you have moved all your belongings out.
- Inventory Inspection: Walk through the property and make a list of areas requiring extra attention. Take "before" photos for your records.
- Gather Supplies: Stock up on cleaning materials--sponges, cloths, speciality cleaners, brushes, vacuum bags, and protective gloves.
- Delegate Tasks: If you're not hiring professionals, assign rooms or zones to friends or family to speed up the process.
- Start High, Finish Low: Clean from the top of each room (ceiling corners and lights) down to the floors to avoid re-soiling clean surfaces.
- Inspect and Touch Up: After cleaning, walk through every room with your checklist and touch up any missed areas before your landlord's inspection.
Landlord Inspection: What to Expect
When you move out, your landlord or letting agent will perform a final inspection, often comparing the current state of the property to the "check-in inventory." Here's what they typically look for:
- Cleanliness: Has the property been returned in as clean a condition as it was at move-in?
- Damage: Are there any new damages beyond fair wear and tear?
- Removal of Personal Property: Has everything except inventory items been removed?
- Smells: Are there unpleasant odours from smoke, pets, or cooking?
If you have performed an extensive end of tenancy cleaning, pass the inspection checklist with confidence! Remember to keep any cleaning receipts or before/after photos as proof, especially if you hired a professional cleaning service.
Expert Tips for End of Rental Cleaning Success
Take your final clean to the next level with these expert tips:
- Read your tenancy agreement -- Double-check if professional steam or carpet cleaning is required.
- Use eco-friendly products: They are better for your health, the environment, and often leave fewer residues.
- Deodorize the space: Use air fresheners, baking soda, or vinegar solutions to neutralize lingering smells.
- Focus on stains immediately: The sooner you address spills or marks, the easier they are to remove.
- Schedule your cleaning for after your move out, ensuring all furniture has been removed for the most thorough job.
Frequently Asked Questions: End of Tenancy Cleaning
How clean does a rental property need to be at the end of the tenancy?
The property should be professionally clean, which means spotless, free of dust, grime, and stains, as closely matching move-in condition as possible. Check your inventory report and lease for specific standards.
Is professional end of tenancy cleaning a legal requirement?
Not always, but many landlords or letting agencies require it if it was done before you moved in. Check your agreement: If it stipulates professional cleaning, ensure to keep receipts as proof after hiring a cleaning service.
What happens if the property isn't clean enough after I move out?
Your landlord may deduct a portion or all of the cleaning cost from your deposit or arrange a professional clean and bill you afterward. Thorough cleaning helps avoid disputes.
How long does end of tenancy cleaning take?
For an average-sized one or two-bedroom property, it can take between 4-8 hours, depending on the condition and amount of cleaning required.
Final Thoughts: Mastering End of Tenancy Cleaning for a Successful Move
Moving on from a rental property doesn't have to be stressful. With a disciplined approach, a comprehensive end of lease cleaning checklist, and an organized plan--whether DIY or with the help of professionals--you will leave your old home sparkling clean. Remember, the key to reclaiming your full deposit and departing on good terms is all in the detail. Make sure every nook and cranny is dust-free, appliances look as good as new, and no personal effects are left behind.
As you turn the page to your next chapter, let this playbook serve as your guide for a hassle-free moving experience. Happy cleaning, and best of luck with your new home!
Additional Resources
- Government guidance: Returning your tenancy deposit
- Citizens Advice: Deposit and end of tenancy cleaning issues
- Tenancy Deposit Scheme Cleaning Guide
For more in-depth information on end of tenancy cleaning tips, best practices, and checklists, browse our other resources or speak with your property manager!